
Shore power
New inlet, new cable, a galvanic isolator, and 120 volts arriving on the boat properly for the first time. Also a lesson about seacocks.
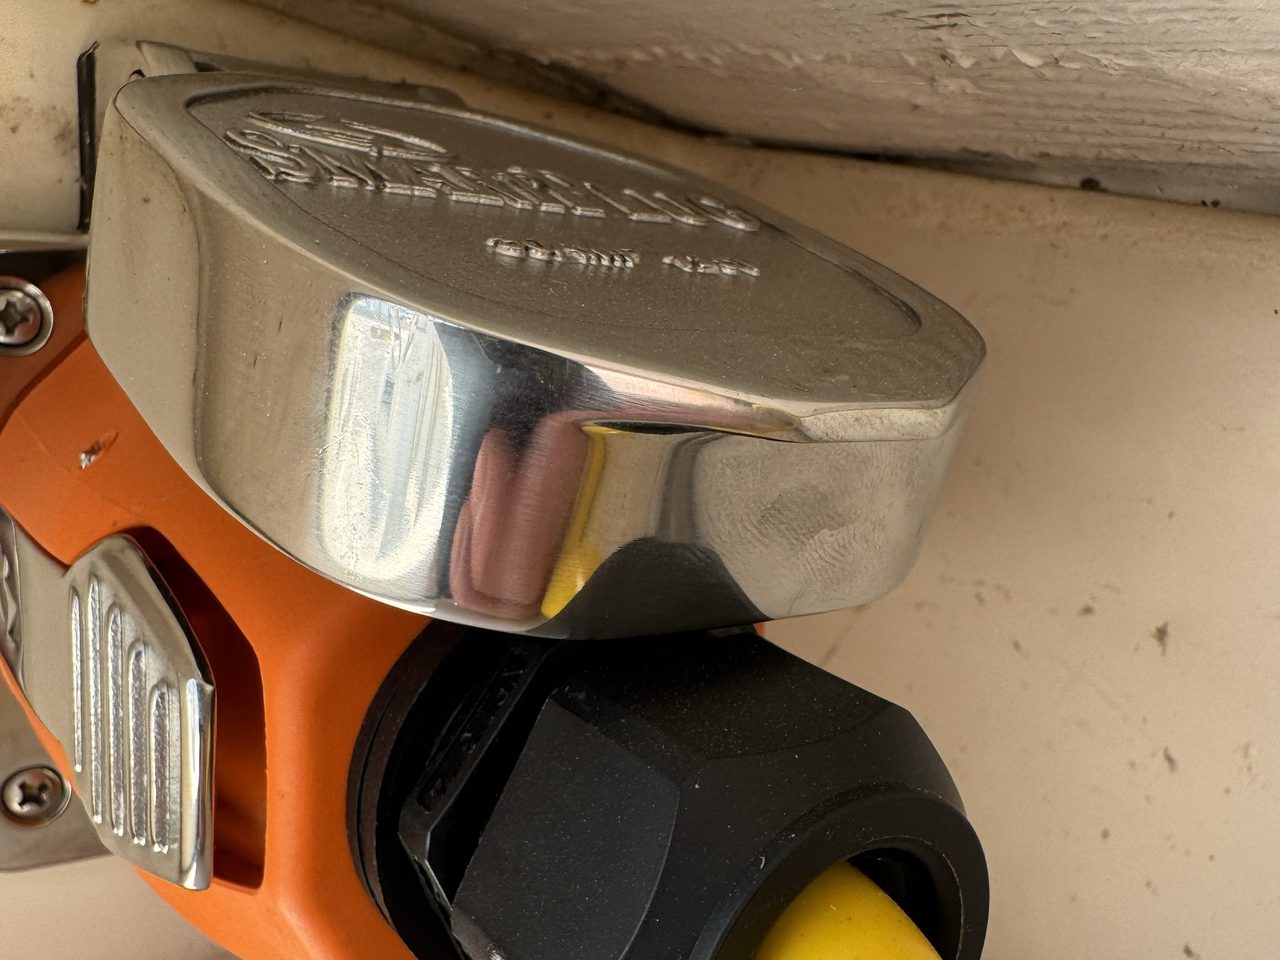
Shore power looked like a small job. It took three weekends, broken into sessions of about ninety minutes to two hours. It was 104°F outside and hotter inside the closed cabin. Until the shore power worked, neither did the air conditioning; fixing the power first was supposed to make the rest of the refit physically possible.
Thirty amps at a twenty-amp slip
Swallow is wired to accept a 30-amp shore-power supply, while our slip at the Yacht Club has a 20-amp household-style receptacle. That is not a problem by itself. An adapter lets the boat's 30-amp plug connect to the 20-amp outlet, while the dock circuit still limits the available current to 20 amps.
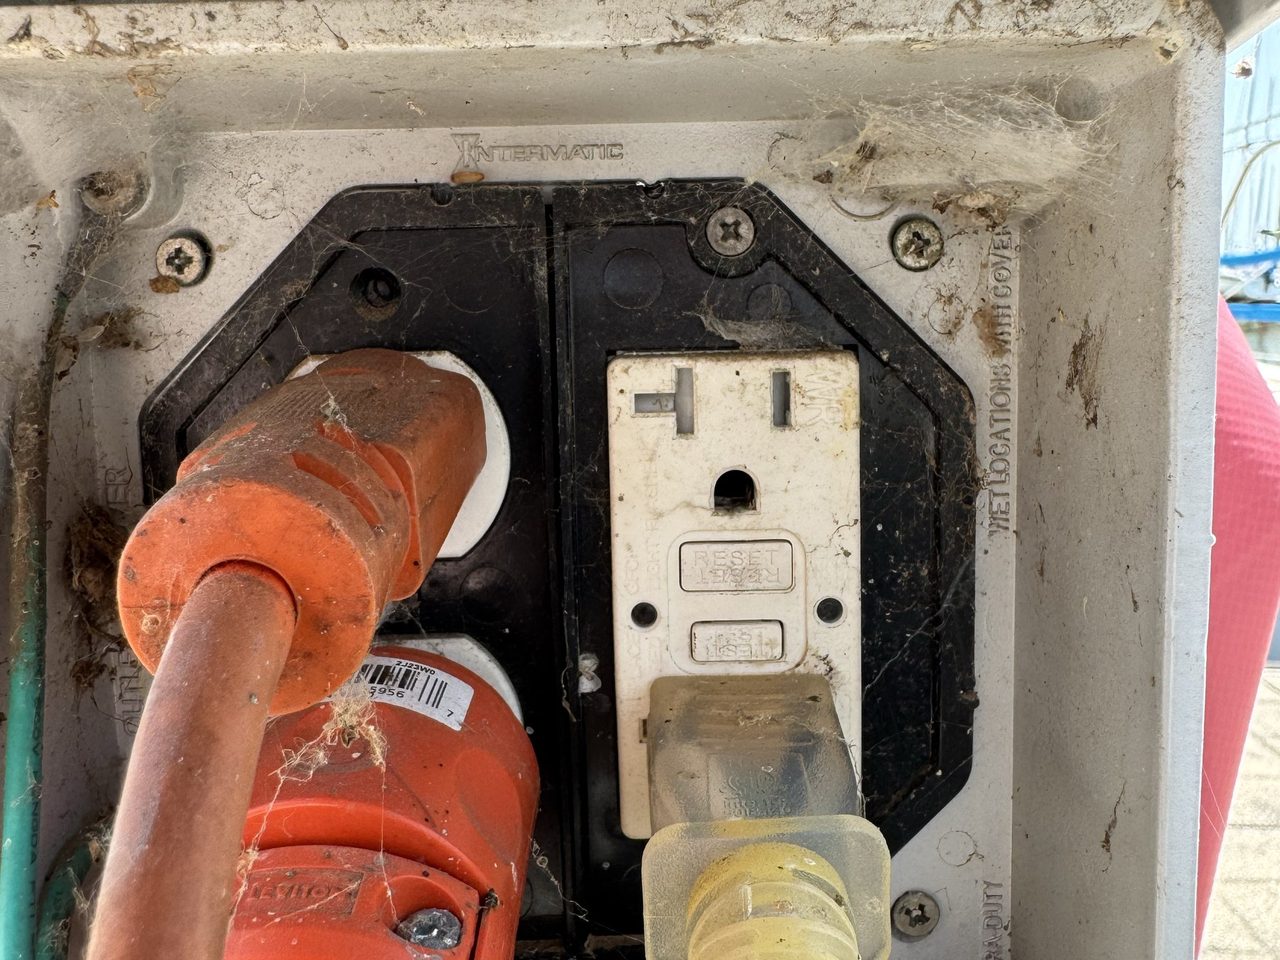
The inlet itself already had to go. One terminal was badly scorched. I initially thought that it was the ground pin, which would have been much more alarming. A later review of the full-size photograph corrected that identification: ground is on the right, neutral at lower left and the burnt blade at the top is live. That points to the much more ordinary failure of a loose or corroded contact heating under the boat's working load.
The previous owner had bridged that gap with a thin domestic extension cord ending in a three-way adapter. Before changing anything, we ran the air conditioner at the old slip and the cord became decidedly warm. Whatever else the job might involve, that cord was not staying.
The obvious solution
I bought a new 50-foot Marinco 30-amp marine cordset. It would plug directly into the existing Marinco inlet on the boat, with the 20-amp adapter moved to the dock end. My plan was to replace the burnt inlet with a new but otherwise identical one. The cord would also be useful if we ever took Swallow to a marina with a normal 30-amp supply.
It technically reached, but only just. The entire run was taut, with no useful slack for the boat or floating dock to move. Something would eventually pull out at the pedestal, strain the inlet on the boat, or both.
The cord's weight created a second problem. Disconnecting it at the boat would leave enough live cable on the dock for the free end to fall straight into the water. The only sensible routine would be to disconnect it at the pedestal first, then either leave an expensive 50-foot cord lying on the dock or coil the whole heavy thing and carry it aboard. If it never came aboard, its usefulness at another marina was theoretical. The plan did not work.
Changing the whole setup made a SmartPlug the obvious next thought, but its longest cord was also 50 feet, even heavier than the Marinco cord and burdened by exactly the same geometry. The connector was better; the arrangement was not.
I therefore turned the plan around. A 10-foot SmartPlug pigtail would run from Swallow to the finger dock, with enough slack for both to move and little enough cable to coil and take aboard. A separate 50-foot DeWalt 10/3 heavy-duty extension cord would stay on the dock, running from a point beside the boat back to the pedestal. Securing it to the side of the dock with rubber-lined P-clips would take the strain off both ends, prevent chafe, keep it off the walking surface and stop it from being dragged into the water.
One section would have to pass underneath the dock. That promised some gymnastics and a long pole, but it was achievable. At the boat end, the two cords would meet inside a weather-resistant rain shield that I would build around the connection. That last part is still on the list and will earn its own Captain's Log entry. Fortunately, this is Texas in summer and rain is not exactly crowding the forecast.
The finished routine would be much simpler: switch off the boat's AC main, unplug the connection beside the boat, coil ten feet of pigtail and leave. The long cord would remain secured to the dock, supported and ready for our return. Much more usable.
Following the cable
That left a useful question while the new parts were in transit: where was everything going to go? The new shore-power circuit also needed a galvanic isolator. It is heavy and needs to be mounted securely, which meant finding both a sound mounting surface and a sensible point in the cable run.
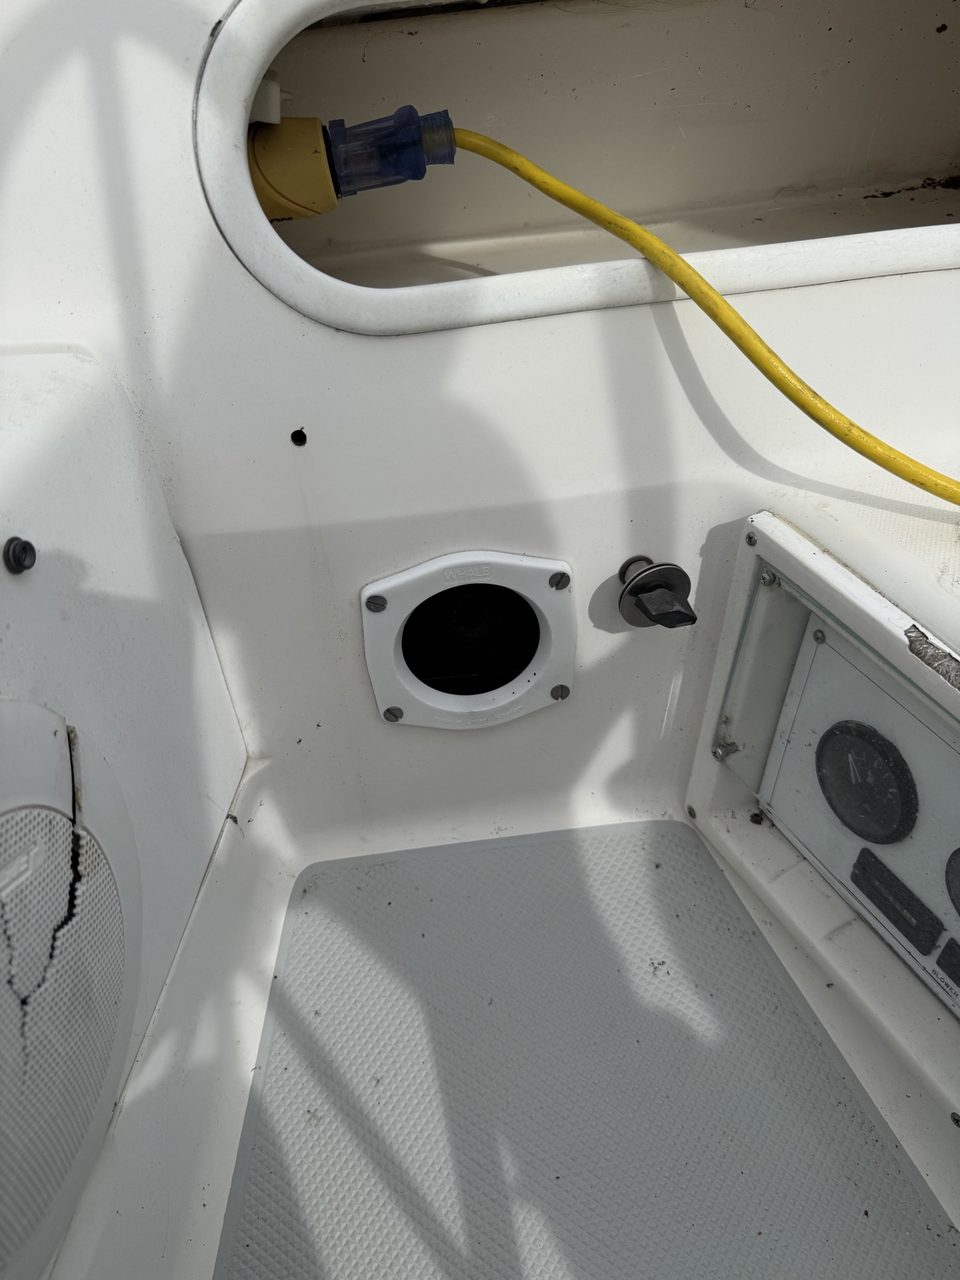
The shore-power inlet sits on the port side, near the back of the cockpit. I assumed that its cable dropped below the inlet and then ran forward through the port lazarette, using the same route as the battery charger's wiring. The charger itself was mounted on a wood panel epoxied to the forward end of that locker. My first thought was to mount the isolator beside it, or move the replacement charger inside the cabin and give the existing panel to the isolator.
The cable did not run through the lazarette at all. It dropped through the port rear locker, passed underneath the lazarette and emerged inside the cabin behind the removable cupboard below the stove. Removing that cupboard exposed the conduit and suggested an easy way to install the replacement: attach the new cable to the old one and use the old cable as a messenger to pull it through.
That route also ruled out the original isolator location. Taking the cable forward into the lazarette and then back again would add a large loop for no purpose. Creating a new route would throw away the one easy way that the boat had given me to pull the replacement. The isolator belonged in the port rear locker, close to the inlet and directly on the existing path.
I removed the false floor from that locker to reach the back of the inlet and found the last problem. The cable had no service loop at all. The inlet could not be pulled far enough out of the hull to reach its terminals, much less disconnect it. Cutting the cable was the only way to remove the old inlet, and the remaining cable would then be too short to connect to its replacement. A complete new run was no longer optional.
If I was pulling new cable anyway, I might as well improve it. I chose 8 AWG, three-conductor, fine-stranded, tinned marine cable: more capacity than this boat needs, but with plenty of margin and construction suited to a moving, damp boat. The first weekend ended after two days with little installed, but with the job resolved on paper: SmartPlug, new cable through the existing conduit, the old cable as its messenger, and the galvanic isolator in the port rear locker. The next weekend could be construction rather than investigation.
No new holes
I do not like drilling holes in a fiberglass boat. Sometimes a hole is the only sensible answer, and I will drill one when that is true. If there is a sound way around it, I am going around it.
Mounting the galvanic isolator directly to the wall of the port rear locker would put its fasteners through into the cockpit. The result would be unsightly and would create more places for water to find its way into the boat. The old battery charger suggested a better answer: epoxy a piece of wood to the inside of the locker, then screw the isolator to the wood without penetrating the fiberglass.
Saturday began with thirty-odd years of dirt. I cleaned the area with denatured alcohol before sanding so that the abrasive would not drive the contamination farther into the surface. I then roughed up both the fiberglass and a piece of wood that I had cut to fit, mixed the epoxy and bonded the wood into place.
This all happened in a locker at the back of the boat that I could reach only by hanging upside down, with my chest across a narrow fiberglass edge and the back of my head cooking in the Texas sun. It was not the most enjoyable job that I have ever done, but it was a doable one, so it got done.
Fast-curing epoxy still needed time before I trusted it with the considerable weight of the isolator. Waiting six hours would push us into the hottest part of the day, so the backing board was Saturday's progress. Before leaving, I cut the cable from the old Marinco inlet and removed it, unscrewed the main panel inside the cabin, and made sure that I had access to the other end of the feed. A test pull showed that the old cable moved freely in the conduit. By then I was baked and ready to stop.
Eight connectors short
I returned on Sunday morning, mounted the isolator to the now-solid backing board, taped the new cable securely to the old one and pulled it through the boat. The messenger plan worked. For the first time, both ends of the new feed were in the open with enough spare cable to work on them properly.
At the inlet, the live and neutral conductors would go directly into the back of the SmartPlug. The green conductor running onward to the panel went to the boat side of the galvanic isolator; a separate piece of green 8 AWG cable would connect the SmartPlug's ground terminal to the isolator's shore side. At the other end, live and neutral would land on the main breakers and ground on the panel's ground bus.
That was the theory. The 8 AWG ring terminals that I had were physically far too large. They fitted the isolator, but would not fit the ground bus properly, and the rings at the main breakers were wide enough that one could touch its neighbor if it ever moved. That was not an acceptable way to finish a shore-power circuit.
I had intended to use ferrules at the SmartPlug. Fine-stranded marine cable is flexible, but all those strands make an ordinary screw termination fiddly: a stray strand can escape the terminal, and the bundle settles as it is tightened. A ferrule crimps the strands into one compact end that is easy to insert, remove and reconnect.
The ferrules supplied with my crimper turned out to be tin-plated brass rather than tinned copper. Brass is much less conductive than copper, which worked directly against the reason for rebuilding the connection in the first place. I was trying to reduce resistance and heat, not introduce a different weak link.
The new order was for a complete set of 8 AWG ring terminals and proper tinned-copper ferrules. I first recorded that I was five connectors short because I had counted three connections as already made. Once I rejected those as well, the real number was eight. The weekend ended with the backing board bonded, the isolator mounted and the new cable pulled, but eight small pieces of metal stood between us and shore power.
Making it live
The new terminals arrived before the next weekend. I made the short green jumper for the inlet ground, with a tinned-copper ferrule at one end, a ring terminal at the other and green heat-shrink finishing the connection. The other conductors received the same color-coded treatment. It was a thing of beauty, and I was rather proud of it.
The rings on the galvanic isolator had to be fitted without seeing them. The isolator sat under the lip that supported the locker's false floor, which meant hanging upside down again and working entirely by feel. Each connection required removing a nut and lock washer, feeding the ring over the stud, replacing the washer and starting the nut without dropping any of them into the pit of despair at the bottom of the locker. I had to do it twice, once on each side of the isolator. The fiberglass edge continued to dig into my chest throughout, but both connections went on and stayed on.
The SmartPlug end looked as though it would be the comfortable part. I could sit on the cockpit seat, prepare the three conductors and insert my immaculate ferrules into the inlet. That was where the next plan met the boat.
I had adopted ferrules because the Victron Energy charger that we would install later uses terminals that accept them neatly. I had seen enough SmartPlug installation videos to understand the job and had supplied my own improvement without studying the terminal shape closely enough. Victron's openings suit a square or hexagonal ferrule. The SmartPlug receptacles are wide, narrow rectangles: large enough for bare 8 AWG stranded cable, but not for the same cable after a ferrule has formed it into a thicker shape.
Three beautifully finished ferrules, complete with their heat-shrink, had to be cut off. I stripped the wires again, gathered the infernal fine strands as tightly as I could, worked them into the rectangular openings and tightened the clamps. A sadder but wiser man.
The inlet itself supplied the next problem. The hole left by the Marinco had not been cut cleanly or quite in the right place. One mounting hole was only a crescent at the edge of the large opening and could never hold a screw. Another had largely torn out. The remaining two screws were biting into thin fiberglass, and the opening itself extended beyond the edge of the SmartPlug flange so that the inside of the locker remained visible beside it. It would not make a reliable weather seal.
The opening was also too high in its alcove. The SmartPlug's lid could not swing far enough upward for the cord-end connector to enter cleanly. At first the connector appeared to be seated but pulled straight back out, despite the side latches that should have locked it in place. Enough wiggling, jiggling and juggling eventually got it fully home for a test, but the installation plainly had to come apart again.
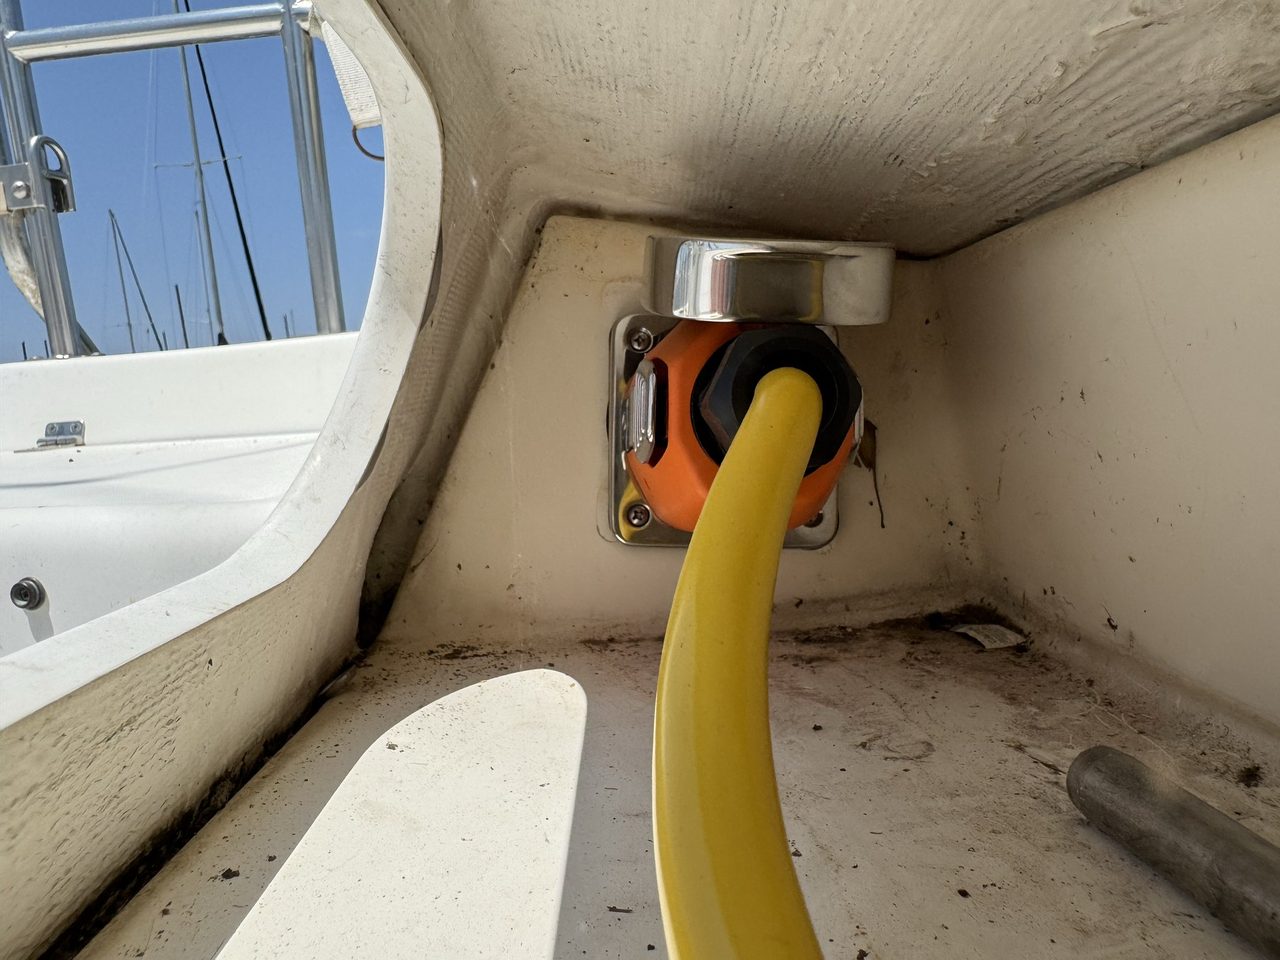
The permanent answer would be a StarBoard overlay. I could cut a properly positioned opening in the StarBoard, mount the SmartPlug to it, then bolt the larger plate to sound fiberglass around the damaged hole. That would cover the gap, provide real fastener locations and let me move the inlet low enough for its lid to open. It would be fine. It would simply have to be done again.
At the panel end, the supposedly correct 8 AWG rings were still too broad. The live and neutral rings could be fitted for a test, although they sat much too close to neighboring terminals. The ground ring would not fit the bus at all, so I trimmed and bent it enough to make a temporary connection. None of that was staying, but I wanted to prove the new circuit before ordering yet another set of terminals.
I connected the SmartPlug pigtail, joined it to the dock extension and plugged the extension into the pedestal. Back aboard, I switched on the main breaker.
We had power. Nothing popped. The charger came up and began putting ten amps into the batteries. After three weekends, shore power was reaching the boat through the new inlet, the heavier feed and the galvanic isolator.
It was still ferociously hot, and the whole reason for doing this job first was to get the air conditioning back. I turned it on. The fan started and air began to move. About a minute later, as the compressor came in, the main breaker tripped.
I reset everything, allowed it to settle and tried again. Fan, one minute, bang.
It was not my day. I was hot, tired and unhappy, which made going home the most productive thing left to do.
The valve I forgot
That evening produced several increasingly elaborate theories. The new cable might be allowing a starting surge that the old undersized extension cord had suppressed. The old main breaker might have become weak. The compressor might be failing. Eventually one missing sound came back to me: I did not remember hearing cooling water circulating. Perhaps the raw-water seacock was still closed.
I ordered genuinely smaller 8 AWG ring terminals for overnight delivery. The Amazon truck arrived at about ten on Sunday morning, which meant a late and already-hot start at the boat. I cut off the temporary rings, crimped the new ones, finished them with heat-shrink and installed them. They fitted properly this time. The temporary panel connections, including the trimmed ground ring, were gone.
The air-conditioner's seacock was indeed closed. Opening it solved the first problem and created the predictable second one: the pump was airlocked. I opened the raw-water circuit, ran the pump, spilled some water and cleared the trapped air before reconnecting the hoses. Then I tried the air conditioning again.
The fan started. The compressor followed. The breaker stayed on.
That settled the shore-power question, although it opened another. The air conditioner was moving air but was not cooling the cabin properly, and the shore feed showed about 19 amps with the compressor running. That consumed almost the entire 20-amp dock supply before allowing for any other load; the usual 80-percent planning limit for a continuous load would be 16 amps. A healthy 16,000 BTU unit should have had no difficulty making a Catalina 270 distinctly cold, even in a Texas summer. This one was not doing it.
The air conditioner is another story. For now, Swallow has shore power. The StarBoard inlet repair and the dock-side rain shield remain on the cleanup list, but the difficult part is finished. The charger can maintain the batteries, and the automatic pumps will not slowly lose their power source while the boat sits at the slip. There is still a problem to solve, but it is no longer the problem that I arrived with on Saturday.
The plan meets the boat
Mike Tyson is usually quoted as saying:
The earliest recorded version, from 1987, was slightly different: "Everybody has plans until they get hit for the first time." Either version describes boat projects rather well.
We arrived at Swallow each weekend with a plan. The boat then supplied a fact that the plan did not know. The first cord reached, but had no slack. The SmartPlug cord solved the connector and repeated the same handling problem. The cable ran under the lazarette rather than through it. The old feed had no service loop, so it had to be cut. The terminals that I thought were usable turned out not to be. Each discovery produced a better plan, usually accompanied by another parts order and the realization that the job would not be finished that weekend.
The lesson is not that planning is pointless. The plan gets us far enough to discover what is actually true. It is simply worth expecting that the first visit may end with better measurements and a new shopping list rather than a completed job. That appears to be the rhythm of working on an old boat: make a plan, let the boat punch it in the mouth, then come back with the right parts.